Words: John Wilson, Caravan Correspondent
For most motorhomers or caravanners with British built vans, having an on-board water tank is unusual and not thought of as required equipment for three-season use. Unfortunately, when planning your ski trip and realising they are pretty well essential, a retro fit can be prohibitively expensive with professional installation potentially costing up to £1000.
Having recently upgraded my own caravan system, I took the opportunity to make this step by step guide to installing an onboard water system in your caravan for less than £100.
If you’re looking to have an on-board solution for your motorhome, James will be posting a motorhome specific version.
It’s always tricky with these things to envisage how easy they are to follow so Hannah has walked through the job, supervised by James (plumber by day), to see if this is an easy job for a novice. They’ve added some tweaks and hopefully you’ll find this as straight forward as Hannah did.
Here we have listed everything you need (and pitfalls to watch out for) and if you have any questions, please put them in the comments below and we’ll answer them. We’ve linked through to the places you can buy the parts and tools required on Amazon or specialist retailers and there’s a complete shopping list at the bottom of the page.
Kit list for the on-board water system upgrade for your caravan (all linked for your convenience):
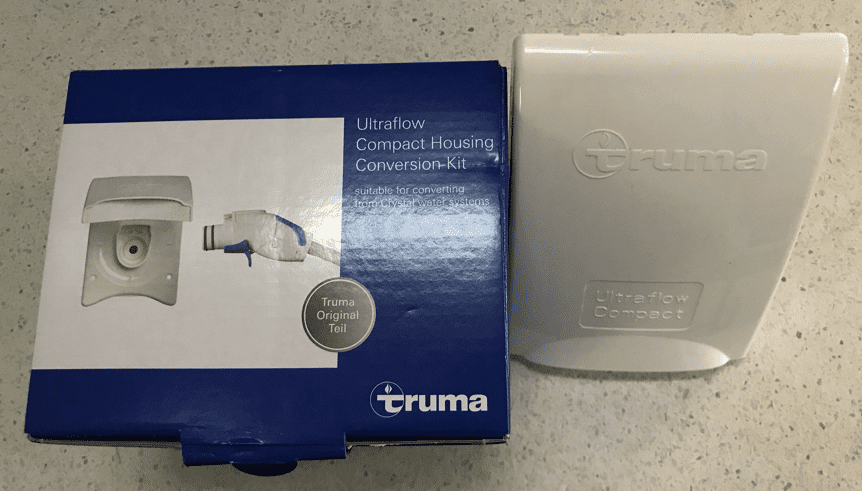
- Truma Compact Housing Conversion Kit
- 12mm semi rigid water pipe
- Push fit connectors x 2
- Isolating Valves x 2
- .75mm 2 Core 12V Cable
- Plastic Pipe Cutter
- Silicon Lubricant Grease
- Connector Block
This DIY on-board water upgrade can be installed in about 4 to 5 hours for under £100 based on the Truma Ultraflow system, which has been a common feature in caravans for several years.
This is the Truma Compact Housing Conversion Kit, which is a duplicate socket that can be internally installed to plug in your water hose to a freestanding water container.
What to buy for this conversion
You can find links to all these items in the list above or at the bottom of the page.
Designed to work with a Truma Ultraflow system with built in filter, the Truma Compact Housing Conversion Kit will also work with earlier compact installations and with some modifications, Whale products as well.
There are three different versions of the kit, (part nos. 46030-01/02/03) 01 has just the housing unit, 02 includes a blanking plug for the external housing and 03 includes a spare pistol grip in case you wish to make up a dedicated pump hose to use inside the van.
For this installation I have used the 03 version which is available here on Amazon. (When buying be careful which kit is being offered as many online stores do not describe it properly and prices vary by up to £20).
As listed above, to install you will also need 12mm semi rigid water pipe; ‘John Guest’ type push fit water connectors; two isolating valves; and sufficient .75mm two core 12v cable to reach from your chosen installation point to the back of your original Ultraflow unit.
15 Step Installation
This description varies from the instructions included in the kit which require you to connect a water pipe from the Ultraflow unit to the new socket in order to utilise the water filter within the original housing. This is in my view undesirable as the filter is external to the van and will freeze if left installed.
I have opted to isolate the original housing completely and plumb the new socket into the nearest available cold water pipe. This has the added benefit of saving around 10m of pipe and a lot of work laying it through the caravan.
- Drain your water system down completely
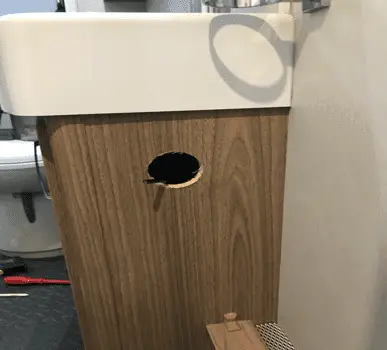
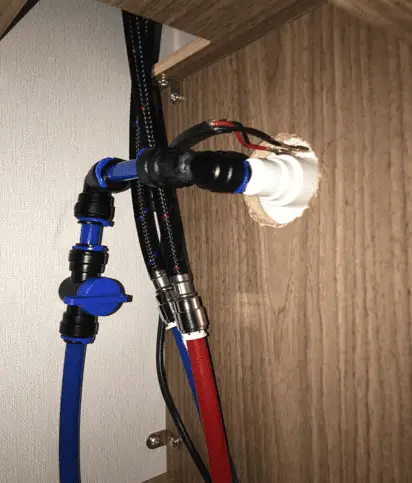
- Decide where in the caravan you wish to fit the socket unit and lay the 12v cable from that point to the rear of the main Ultraflow unit. This can be the most difficult part of the job as it may mean dismantling some cabinetry in the caravan to route the cable discretely. An ideal location for the new socket is in the bathroom close to or in the sink unit as it will be very close to an existing cold water supply
- Ensure you have sufficient access to make your connections and will not damage existing pipework
- Cut a hole large enough to accommodate the rear of the socket (55-57mm)
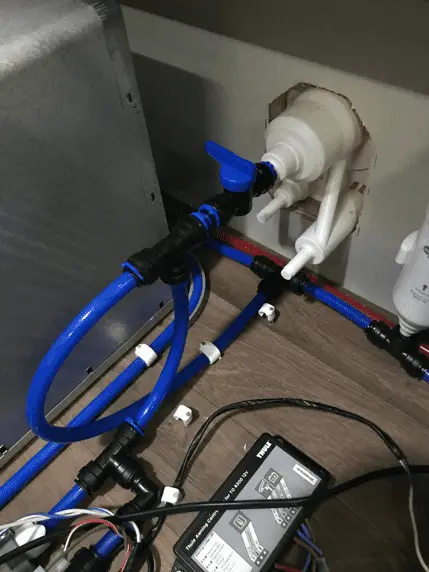
- Identify the best place to connect to the existing water pipe and fit a T piece push fit water connector into the existing water pipe
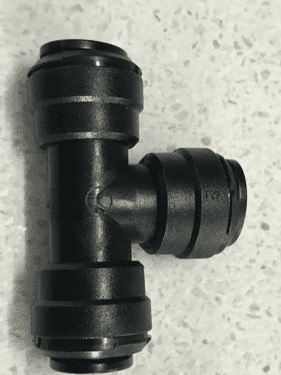
Fit a T-Piece push fit - Use the correct tool to cut the pipe to ensure a clean square cut and make sure you push the pipe firmly all the way into the connector. You can pay over £100 just for a plastic pipe cutter, but one around £10 will do the job and any other mods you want to complete fine – if you’re going into plumbing, you might want to spend a bit more.
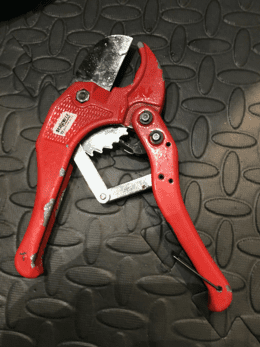
Plastic Pipe Cutter - Add in a bit of silicon lubricant grease (If you get this stuff with the long nozzle you can also use it to grease your locks, door and window seals ) which will help the fitting slide home smoothly.
- If you need to adjust the fittings you can remove pipe by pressing down on the collar and gently pulling the pipe out. To prevent accidental movement in the pipe a later stage insert a collet when you are happy the install is complete. This is an optional precaution.
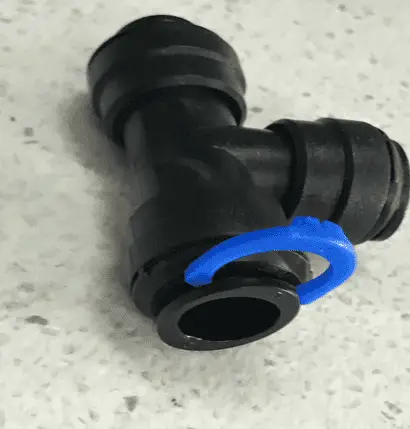
T-piece with collet - Connect the rear of your new socket to the T piece ensuring you install an isolating valve in the pipe run to prevent water running back up the system and into the bathroom when using the external Ultraflow in summer
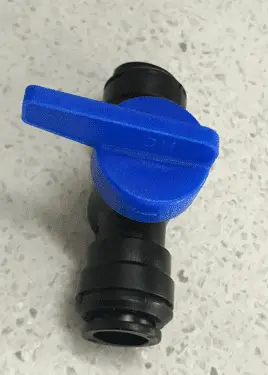
Isolator Valve - Connect the 12v cable to the rear of the socket using the spade connectors provided in the kit, and fix the socket to the cabinet using stainless steel screws.
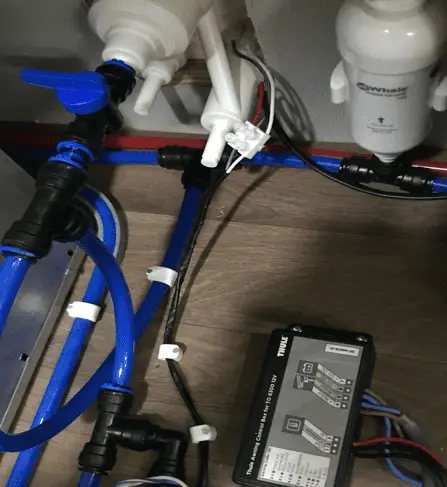
Connect the 12v Cable 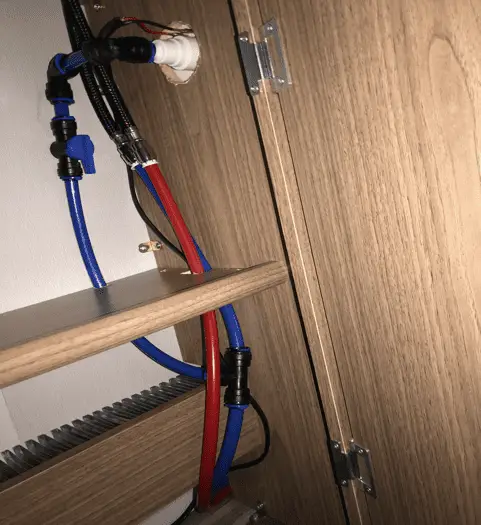
Fit to socket to the cabinet - Move to the rear of the Ultraflow unit.
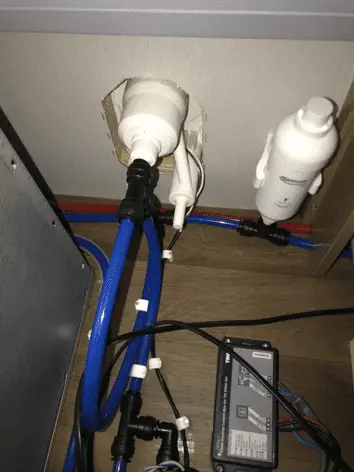
Before fitting t-piece and valve - Remove the original T piece connector by depressing the collars on the fitting and pulling the pipe out. Insert another isolating valve onto the rear of the unit and refit the T piece behind the valve. Some trimming of the original pipe and insertion of a small length of new pipe is required.
After fitting t-piece and valve - Ensure this isolating valve is turned off and the filter is removed. The external parts of the housing should be free from residual water
- Now join the end of your 12v cable to the existing connections on the Ultraflow unit. This can be a very tight fit due to the design of the unit. If you are struggling use a connector block. Not pretty but effective and an easy fit
Connector block - Fix the front socket facing and pass hose into your water container
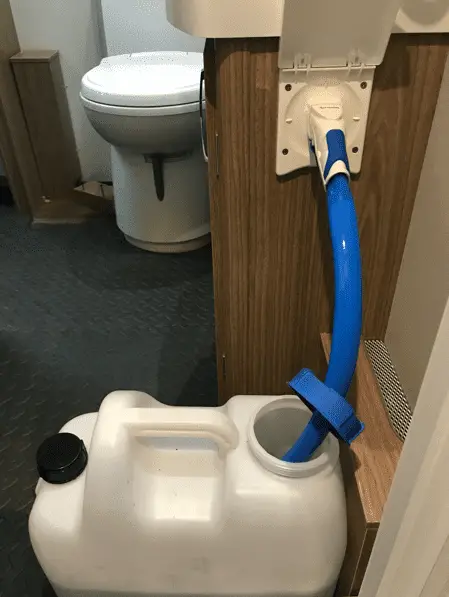
Fit socket facing
Commissioning
Because you have effectively changed the direction of water flow in the caravan you may encounter some air blockage in the pipework when you connect the pump and water supply. Here’s how you fix this:
- Open your taps one at a time to let air escape
- Draw the water round the system and momentarily open up the main stopcocks on the caravan. This will allow air to escape from the bottom of the system below tap level.
- Once your water is running smoothly and you are happy that there are no leaks, turn off the taps
- Allow the pump to run on until the pressurised system resets itself. This may take a few minutes before the pump stops automatically.
- Try the taps again to check the delay time on the pressurised switch is working correctly.
Top Tips and stuff that’s important to know
It is important to remember to close the isolating valve in the bathroom before opening the one attached to the Ultraflow unit when you want to use the external supply in summer or you will flood the bathroom. It is possible to buy push fit non return valves to put in the water line at each end instead of or as well as isolating valves. They have been known to fail so take a cautionary approach.
In winter when travelling, it is good practice to drain your whole system down when towing to avoid freezing in transit. In summer this is not needed so this modification allows you to ’plug in’ to a water container and have water on tap for mid journey stops.
All the parts used are available online from stores such as Amazon & Outdoor Bits, or from your local Caravan store. I used W4 fittings and pipe, which are just as good as John Guest, Whale and Truma branded parts, just cheaper. I bought my kit from Aztec Leisure but the one listed here on Amazon is the exact part number and has been cheaper every time we’ve checked.
Shopping list recap:
- Truma Compact Housing Conversion Kit
- 12mm semi rigid water pipe
- Push fit connectors x 2
- Isolating Valves x 2
- .75mm 2 Core 12V Cable
- Plastic Pipe Cutter
- Silicon Lubricant Grease
- Connector Block
A huge thanks to John for helping out with this guide – we know a lot of you are going to find it handy in the future and what it means is that some of you considering buying a British van (which are significantly cheaper second hand than their European cousins) can make these modifications in advance of your trip.
If you’re interested in hearing more from us – including discounts, perks, places to stay and more handy guides, please join the mailing list below.
[yikes-mailchimp form=”1″ title=”1″ description=”1″]